

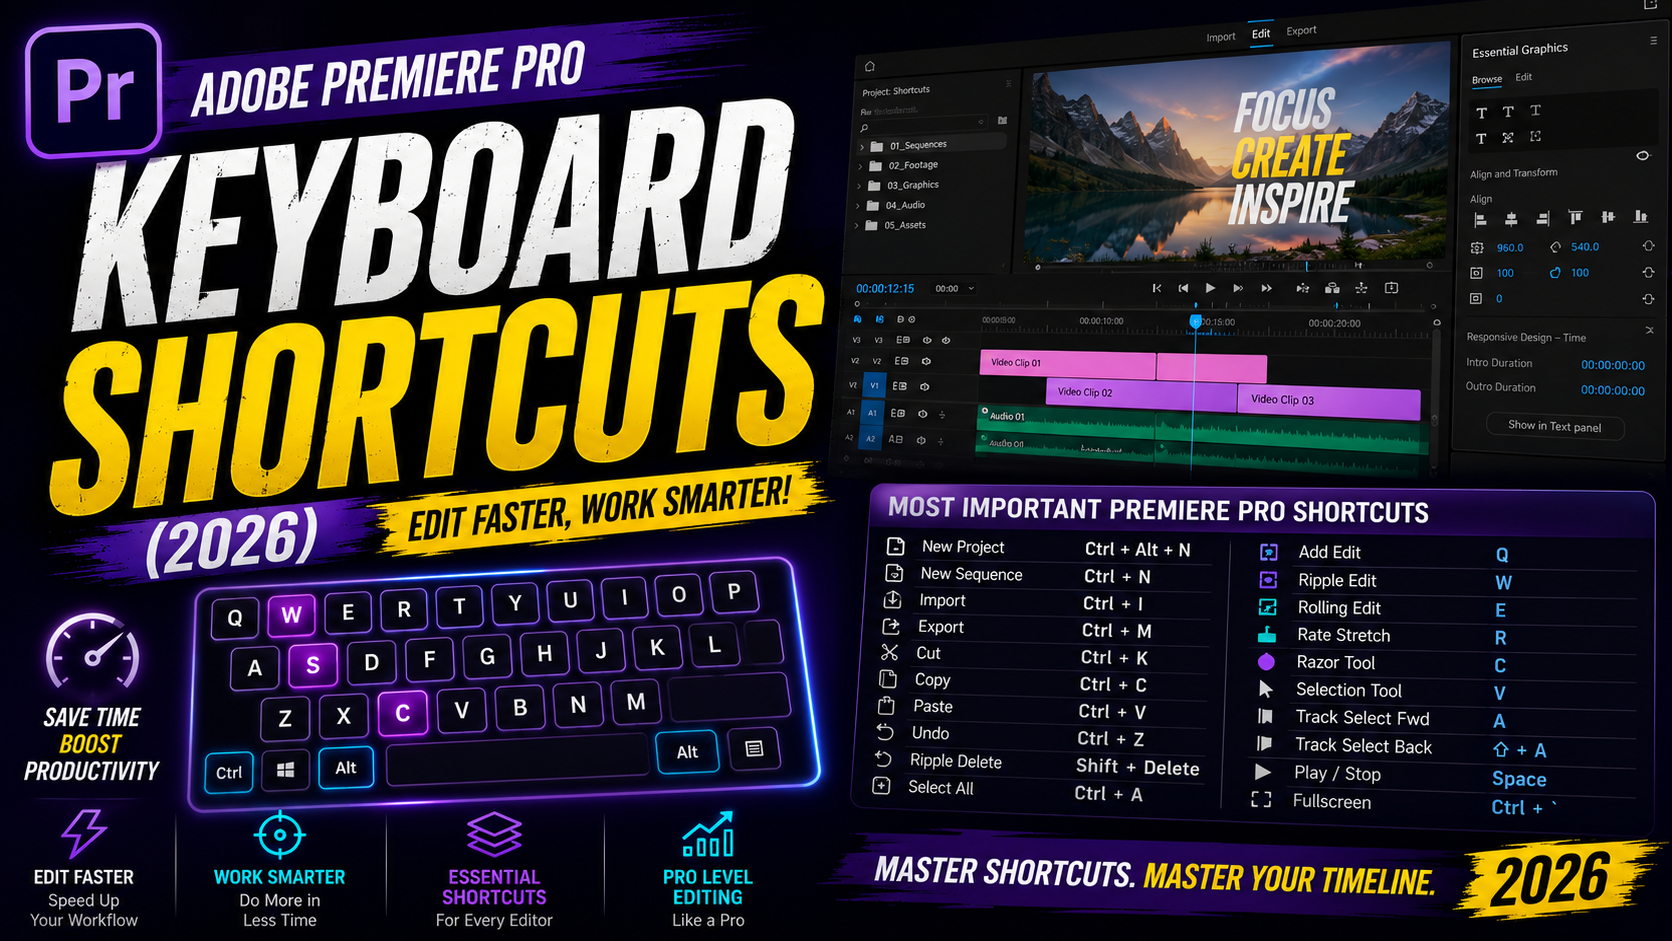

Adobe Premiere Pro Keyboard Shortcuts (2026):
Watch any experienced editor work, and you’ll notice something immediately: their hands barely touch the mouse. Every trim, cut, and transition happens through a handful of keystrokes, while the mouse stays parked on the trackpad or scroll wheel for scrubbing through footage. That difference alone can cut hours off a long editing session.
This guide breaks down the Adobe Premiere Pro keyboard shortcuts worth memorizing first, organized by what you’re actually doing, editing, navigating the timeline, working with text, and exporting, so you can start building faster habits today instead of hunting through menus.
Why Learning Premiere Pro Shortcuts Actually Matters:
It’s tempting to think shortcuts are a minor convenience, but the real benefit compounds over time. Every menu click you eliminate is a few seconds saved, and across a full editing session, that adds up to meaningfully faster turnaround, especially on repetitive tasks like trimming clips or adding cuts.
There’s also a workflow benefit beyond raw speed: staying in a keyboard-driven rhythm keeps you focused on the footage instead of breaking concentration to hunt for a button in a panel.
Essential Editing Shortcuts:
Basic Trim and Cut Tools
C — Razor tool (cut a clip at the playhead)
V — Selection tool
Ctrl/Cmd + K — Cut clip at the playhead using the current tool
Q — Ripple trim previous edit to playhead
W — Ripple trim next edit to playhead
Insert and Overwrite
, (comma) — Insert clip at the playhead, shifting everything after it
. (period) — Overwrite clip at the playhead without shifting other clips
Undo and Redo
Ctrl/Cmd + Z — Undo
Ctrl/Cmd + Shift + Z — Redo
Timeline Navigation Shortcuts
Moving the Playhead
Left/Right Arrow — Move one frame back or forward
Shift + Left/Right Arrow — Jump five frames back or forward
Home — Jump to the beginning of the sequence
End — Jump to the end of the sequence
Zooming and Scrubbing
+ / – — Zoom in or out on the timeline
\ (backslash) — Fit the entire sequence into the timeline view
J / K / L — Shuttle playback backward, pause, and forward, with repeated presses increasing speed
Markers
M — Add a marker at the current playhead position
Shift + M — Jump to the next marker
Ctrl/Cmd + Shift + M — Jump to the previous marker
Text and Graphics Shortcuts
Adding Text
T — Select the Type tool to add a new text layer directly onto the timeline
Styling Text
Most font, size, and color adjustments now happen through the Properties panel rather than a dedicated shortcut, since Adobe restructured how text editing works in recent versions. Selecting your text layer and opening the Properties panel remains the fastest route to styling changes.
Animating Text:
Stopwatch icon click (no default keyboard shortcut) — Enable keyframing on a property in Effect Controls, the same process used for animating video clips, applies directly to text layers as well.
Audio Editing Shortcuts
Ctrl/Cmd + Shift + [ — Add an audio keyframe at the playhead position on a selected clip
U — Show or hide audio waveforms in the timeline for easier visual editing
Shift + G — Open the Audio Gain dialog for a selected clip
Export and Project Management Shortcuts
Ctrl/Cmd + M — Open the Export Settings window
Ctrl/Cmd + S — Save your current project
Ctrl/Cmd + Shift + S — Save a copy of your project under a new name
Customizing Your Own Premiere Pro Shortcuts
Premiere Pro allows full shortcut customization through Edit > Keyboard Shortcuts (Windows) or Premiere Pro > Keyboard Shortcuts (Mac). This is worth exploring once you’re comfortable with the defaults, since you can remap frequently used commands to keys that feel more natural for your specific workflow, or match shortcuts you’re already used to from another editing program.
Mac vs Windows Differences:
Most shortcuts follow the same pattern between platforms, with Ctrl on Windows generally mapping to Cmd on Mac. A handful of shortcuts do differ slightly due to how each operating system reserves certain key combinations, so it’s worth double-checking any shortcut that doesn’t behave as expected when switching between platforms.
Frequently Asked Questions:
What is the most useful Premiere Pro keyboard shortcut for beginners? J, K, and L for shuttle playback are often considered the highest-impact shortcuts to learn first, since they let you scrub through footage at variable speeds without touching the mouse at all.
How do I cut a clip in Premiere Pro using a shortcut? Press C to select the Razor tool, then click at the playhead position to cut the clip, or use Ctrl/Cmd + K to cut directly at the playhead using whatever tool is currently active.
Can I customize Premiere Pro’s keyboard shortcuts? Yes. Go to Edit > Keyboard Shortcuts on Windows or Premiere Pro > Keyboard Shortcuts on Mac to remap any command to a key combination that fits your workflow.
Are Premiere Pro keyboard shortcuts the same on Mac and Windows? Mostly, with Ctrl on Windows generally corresponding to Cmd on Mac. A small number of shortcuts differ due to operating system-level key reservations.
What shortcut adds a marker in Premiere Pro? Press M to add a marker at the current playhead position, and Shift + M or Ctrl/Cmd + Shift + M to jump to the next or previous marker.
Final Thoughts:
You don’t need to memorize every shortcut in Premiere Pro overnight. Start with the editing basics, C, V, and J/K/L, and layer in timeline navigation and text shortcuts as they become relevant to your workflow. Within a few projects, reaching for the mouse for routine tasks will start to feel slower than it’s worth.
Print this list out, or keep it open in a second window during your next edit, and try replacing just three or four mouse clicks per session with their keyboard equivalents. That small habit change adds up faster than most editors expect.
Leave a Reply