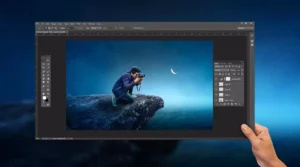
Adobe Photoshop | An Introduction
Welcome to our brand-new Adobe Photoshop category! Regardless of your background—photography enthusiast, aspiring graphic designer, or simply interested in digital art—this guide will help you get started with one of the most potent and adaptable tools on the market.
Adobe Photoshop: What is it?
Adobe Photoshop is a potent program used for digital art, graphic design, and picture manipulation. Photoshop, a program created by Adobe Inc., provides a vast array of tools and capabilities that enable users to precisely and creatively create, edit, and modify images.
Why Learn Photoshop?
- Versatility: Photoshop has a wide range of applications, including digital painting, animation, and graphic design in addition to photo editing.
- Industry Standard: Professionals in a wide range of fields, such as graphic design, web design, photography, and more, frequently use Photoshop.
- Creative Potential: You can realize your ideas thanks to the software’s limitless creative capabilities.

How to Begin with Photoshop:
1. Installation and Configuration:
Installing Photoshop on your computer is a prerequisite before using it. Take these actions:
Go to the website for Adobe Photoshop:
Select a subscription plan based on your requirements (Adobe Creative Cloud includes Photoshop).
Install the software by downloading it and following the prompts on the screen.
After installation, launch Photoshop and get acquainted with the user interface.
2. Recognizing the Interface:
The Photoshop interface is meant to be user-friendly, even though it may initially seem complicated. These are the essential elements:
- The navigation bar is at the top and has a number of options, including File, Edit, Image, Layer, and more.
- The toolbox, which is located on the left, has all of the equipment you’ll need for altering and producing photographs.
- Options Bar: Showing options for the tool that is presently selected, it is situated beneath the Menu Bar.
- Panels: To assist you in organizing and modifying your work, the right side of the screen has panels named Layers, Properties, and History.
- Workspace: The main location where you will do image editing.
3. Fundamental Tools and Their Purposes:
Let’s examine a few of Photoshop’s most important tools:
- Move Tool (V): This tool is used to move the canvas’s chosen elements around.
- Marquee Tools (M): For selecting single rows, single columns, rectangles, and ellipses.
- Allows for freehand, polygonal (straight-edged), and magnetic selections using the Lasso Tools (L).
- The Quick Selection Tool (W) rapidly chooses regions by comparing their colors and textures.
- Crop Tool (C): This tool crop photos to a predetermined rectangle in size.
- Use the brush tool (B) to paint and draw on the canvas.
- Eraser Tool (E): Removes certain areas from an image.
- Text Tool (T): Embellish your photos with text.
4. Layers and How Important They Are:
Using layers is one of Photoshop’s most potent capabilities. Using layers to divide up your project’s components makes it simpler to manage and modify your work. Imagine layers as transparent paper sheets layered on top of one another.
- To create a new layer, either use the keyboard shortcut Ctrl+Shift+N (Cmd+Shift+N on Mac) or click the “New Layer” button located at the bottom of the Layers panel.
- Managing Layers: To maintain organization in your project, you can group, rename, and reorganize layers.
- Layer Styles: Use effects to improve your layers, such as glows, drop shadows, and bevels.

Let’s now attempt some fundamental editing methods:
- To change the contrast and brightness, select Image > Adjustments > Brightness/Contrast.
- To resize an image, select Image > Image Size and type in the required size.
- Cropping: Choose the Crop Tool, drag it over the region you wish to preserve, and then hit the Enter key.
- Blemish Removal: To erase flaws, use the Spot Healing Brush Tool.
6. Keeping Your Work Safe and Exportable:
After completing your project to your satisfaction, save and export your work:
To preserve layers and editing capabilities, select Photoshop (PSD) from the File > Save As menu.
To export an image, select your preferred format (JPEG, PNG, etc.) under File > Export > Export As.
Advice for Beginners:
- Practice Frequently: You’ll get more accustomed to Photoshop’s capabilities the more you use it.
- Employ Keyboard Hotkeys: Acquire familiar shortcuts to expedite your work process.
- Examine Tutorials: To assist you in learning particular procedures, a plethora of tutorials are accessible on the internet.
- Become a Part of Communities: Use forums and social media groups to interact with other Photoshop users in order to exchange advice and solicit criticism.

In summary:
With the help of Adobe Photoshop, you can take your imaginative concepts and turn them into breathtaking visual reality. You’ll soon be able to realize its full potential if you grasp the fundamentals and practice frequently. Watch this space for additional guides and advice in our Adobe Photoshop area!
Have fun with your edits!