1: Set Up Your Document
- Open Photoshop and create a new document with the desired dimensions for your poster. Typically, poster sizes are larger than standard print sizes (e.g., 18×24 inches or 24×36 inches).
2: Choose a Background
Select a background color or image that complements the style and theme of your wardrobe. Use the “Paint Bucket” tool or place an image as the background layer.
3: Add Images of Wardrobe Items
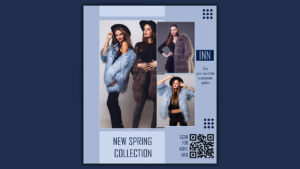
Collect high-quality images of wardrobe items you want to feature. Use the “Place” command (File > Place) to insert each image onto your canvas. Arrange the images in an aesthetically pleasing way, considering balance and visual flow.
4: Create a Focal Point
Choose a central image or text element to serve as the focal point of your poster. Apply effects like a drop shadow or a subtle glow to make the focal point stand out.
5: Include Text Elements
Add a catchy title at the top of the poster using the Text tool. Provide details about the wardrobe items, such as brand names, features, or promotions. Use a consistent font style and size for a professional look. Experiment with font colors that contrast well with the background.
6: Incorporate Graphic Elements
Include icons or graphics related to fashion and wardrobe to enhance the visual appeal. Place borders or decorative elements around the text to add flair.
7: Adjust and Enhance
Fine-tune the placement and size of each element to achieve a balanced composition. Use Photoshop’s adjustment layers to modify the overall color balance, contrast, and saturation.
8: Add Branding
Incorporate your brand logo in a prominent yet unobtrusive location. Maintain consistency with brand colors and fonts.
9: Proofread and Review
Double-check all text for accuracy and clarity. Review the overall design to ensure a cohesive and visually appealing look.
10: Save and Export
Save your Photoshop file in case you need to make future edits. Export your final design in a suitable format (e.g., JPEG, PNG) for printing or online sharing.


Reviews
There are no reviews yet.